华强方特网站开发,关键字参数,如何做网络销售,推广引流渠道原博文
2017-11-14 15:29 −
os.system#xff08;返回值为0,1,2#xff09;方法 0#xff1a;成功 1#xff1a;失败 2#xff1a;错误 os.system默认阻塞当前程序执行#xff0c;在cmd命令前加入start可不阻塞当前程序执行。 例如#xff1a; import os nbs...
相…原博文
2017-11-14 15:29 −
os.system返回值为0,1,2方法 0成功 1失败 2错误 os.system默认阻塞当前程序执行在cmd命令前加入start可不阻塞当前程序执行。 例如 import os nbs...
相关推荐
2019-12-18 20:09 −
其实C语言也可以控制电脑关机什么的啊,以前竟然无知的连这个都不知道.悲哀啊.让各路大牛尽情嘲笑啊..
#include
#include
int main ()
{
...
2019-12-18 20:09 −
其实C语言也可以控制电脑关机什么的啊,以前竟然无知的连这个都不知道.悲哀啊.让各路大牛尽情嘲笑啊..
#include
#include
int main ()
{
...
2019-12-06 17:23 −
## 1.今日大纲 1. 序列化模块jsonpickle
2. sys模块
3. os模块
4. hashlib模块md5sha系列 ## 2.具体内容 1. 系列化模块 将一个数据结构转化成一个特殊序列特殊字符串的过程 可以反转 将一个字符串转化为一个数据结构...
2019-09-27 18:40 −
1.getcwdd() 获得应用程序当前的工作目录 #getcwd() 获取应用程序当前的工作目录 import os print(os.getcwd()) 2.chdir(path) 改变当前工作目录 os.chdir(E:\\)#更改工作目录...0118
2019-12-20 13:56 −
python中对文件、文件夹文件操作函数的操作需要涉及到os模块和shutil模块。
得到当前工作目录即当前Python脚本工作的目录路径: os.getcwd()
返回指定目录下的所有文件和目录名:os.listdir()
函数用来删除一个文件:os.re...
2019-12-10 15:33 −
os模块的作用获取文件的路径及进行路径相关的操作
首先导入模块此模块是python内部不用下载直接导入
import os
os.mkidir(目录名字)在此目录下创建一个文件夹
os.makedirs(a/b/c)创建多级目录嵌套
os.getcwd():获取当前文件的路径
...
2019-12-18 20:54 −
import os# import shutil# os.mkdir(af) #创建文件夹# print(os.getcwd()) #获取当前目录# os.rmdir(af) #删除目录# shutil.rmtree(af) #删除非空目录# print(os.name) #获取操...098
2019-12-13 10:25 −
## os模块 ### 1文件夹相关 - os模块是与操作系统交互的一个接口 - 功能工作目录路径文件等相关 - 目录文件夹当前目录工作目录父级目录指的都是同一个就是文件所在的文件夹 - os.makedirs(dirname1/dirname2) 可生成多层递归目录...
2019-11-27 13:27 −
os.getcwd()
获取当前工作目录即当前python脚本工作的目录路径
import os
print(os.getcwd())
os.chdir(dirname)
改变当前脚本工作目录相当于shell下cd
os.chdir(E:\Python学习)...
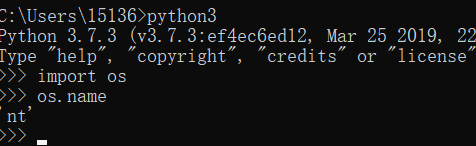
2019-12-05 10:06 −
OS模块 用于处理文件与目录
* os.name * 属性访问当前操作系统的名称
Window’nt’
L...